


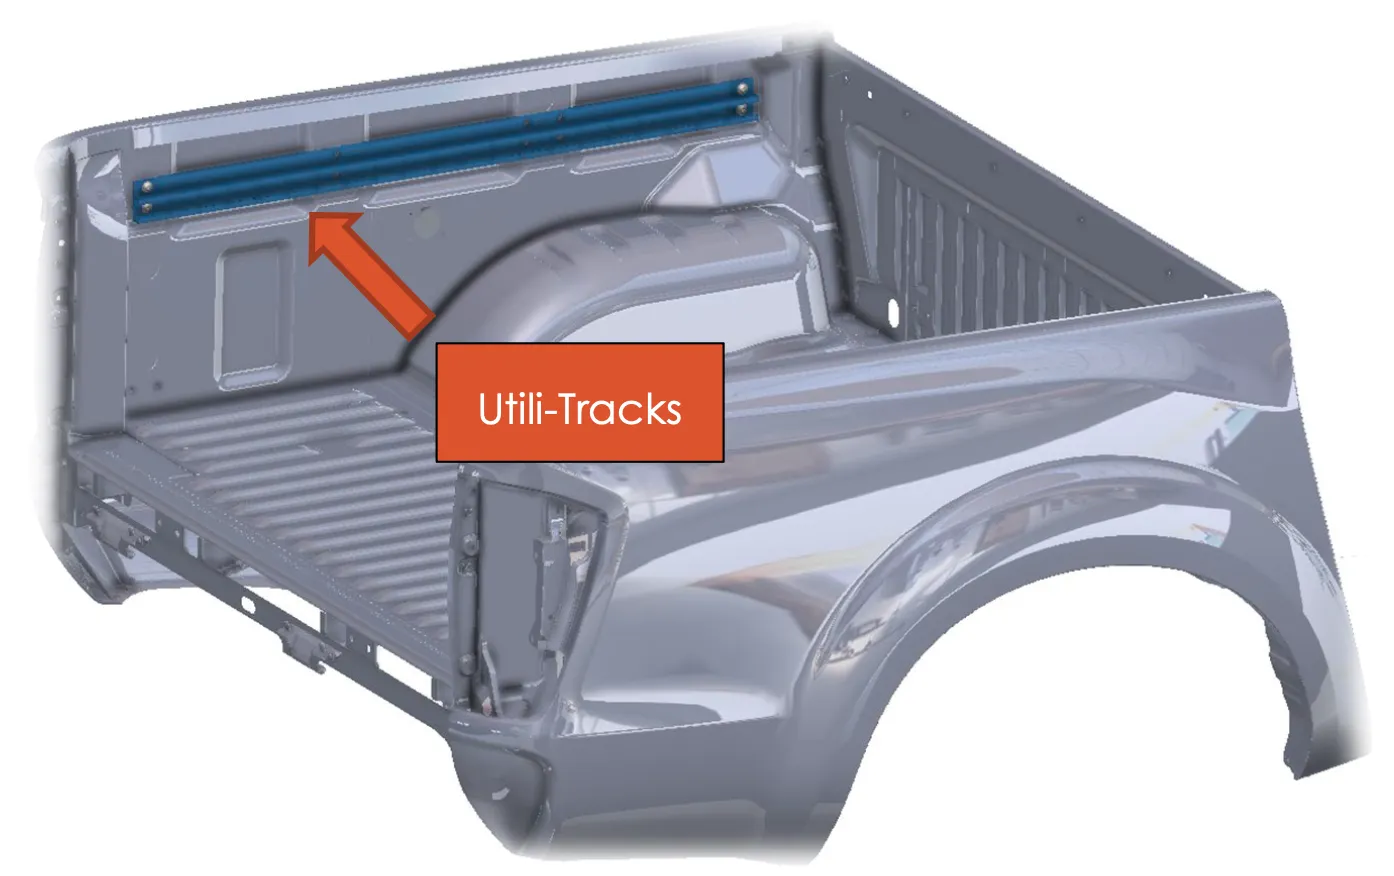
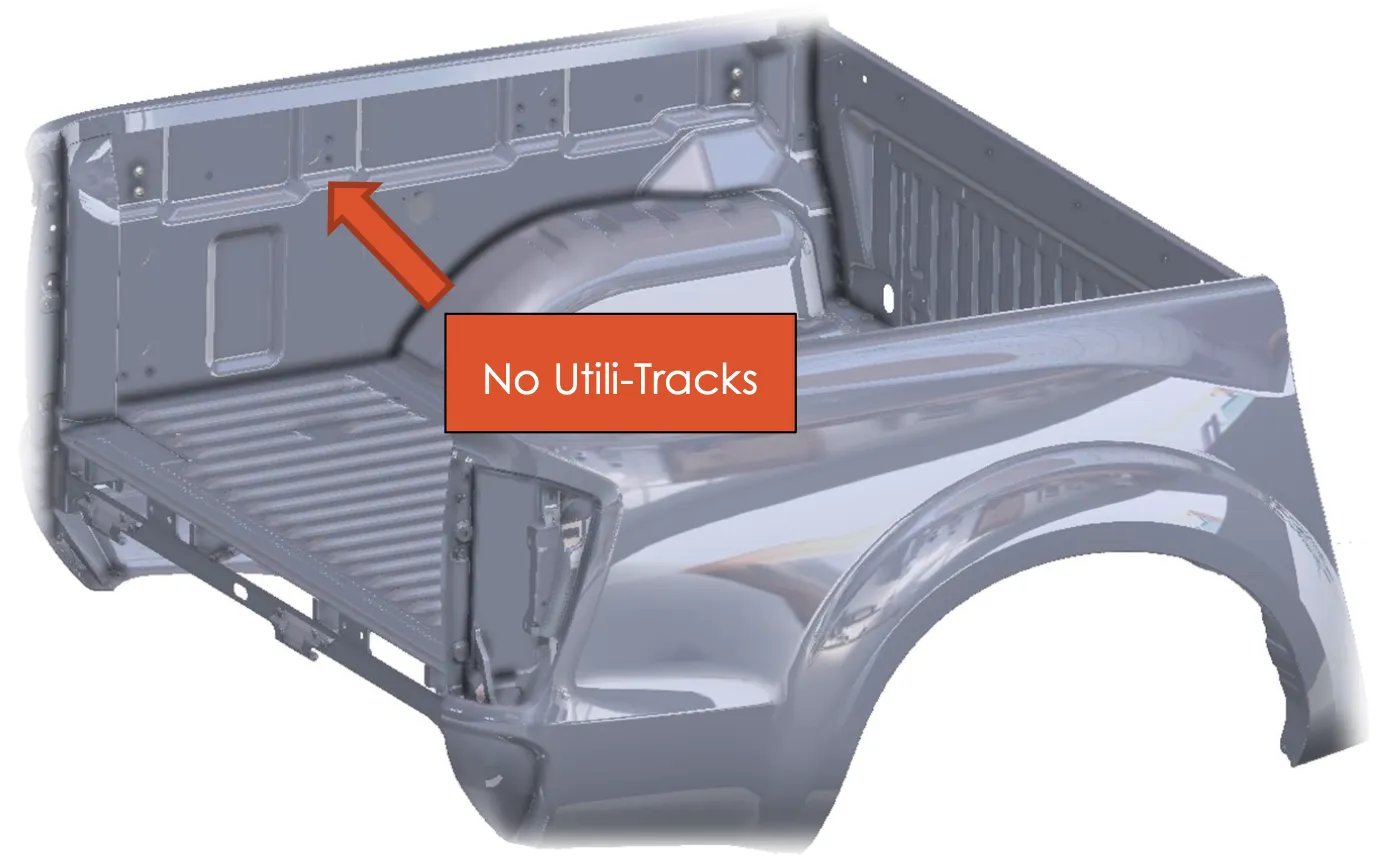
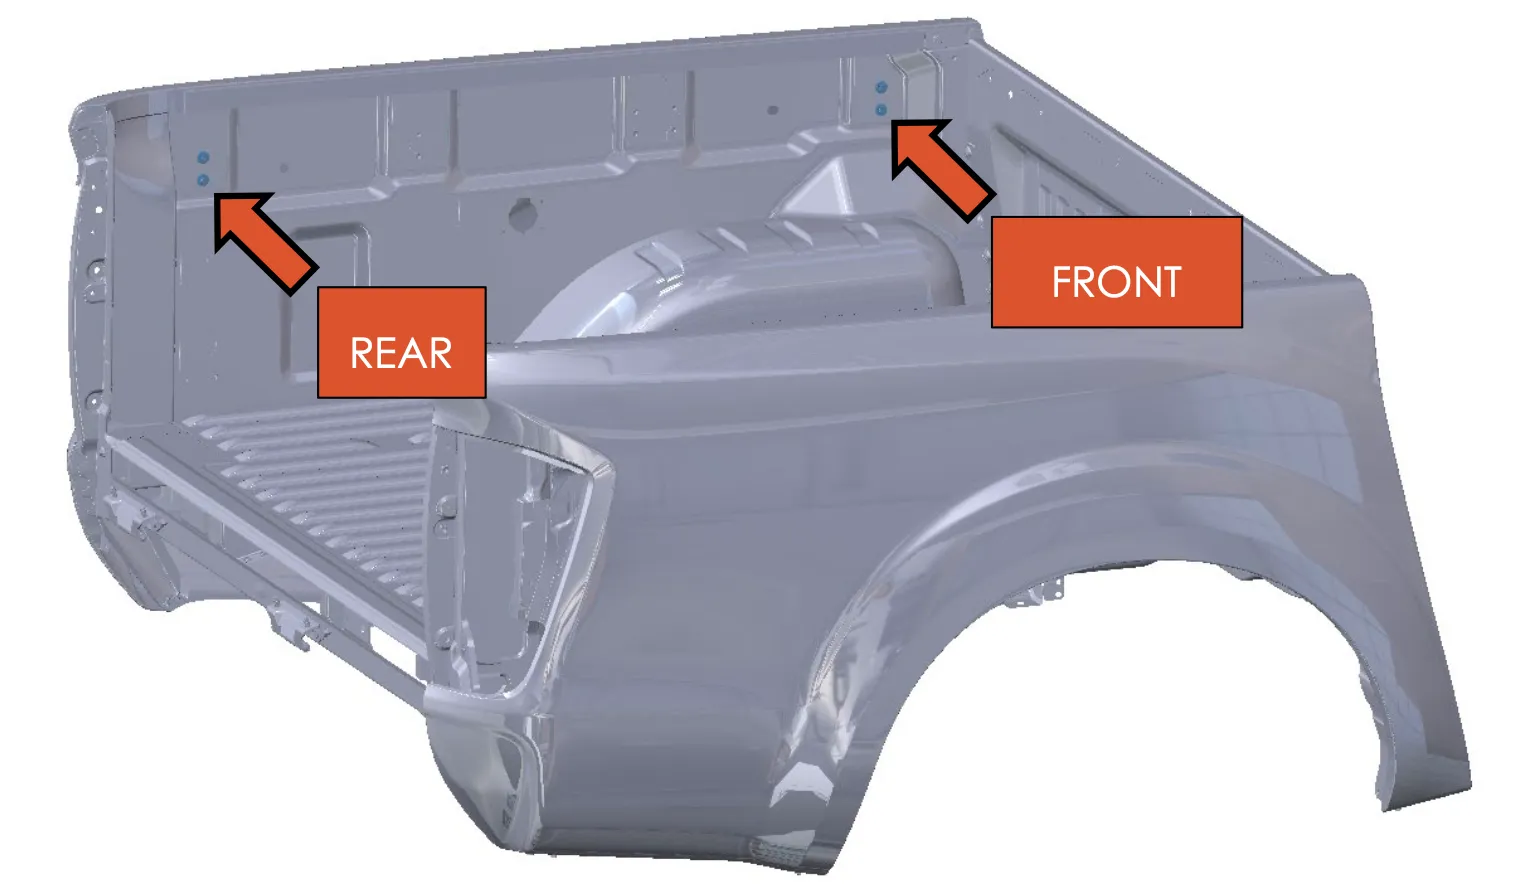
- Identify the difference between the LE/Pro & SE load box type. (Images Below)
- Follow the fitment instructions according to your load box type.
o LE & Pro derivative Load boxes:
o SE Load box:
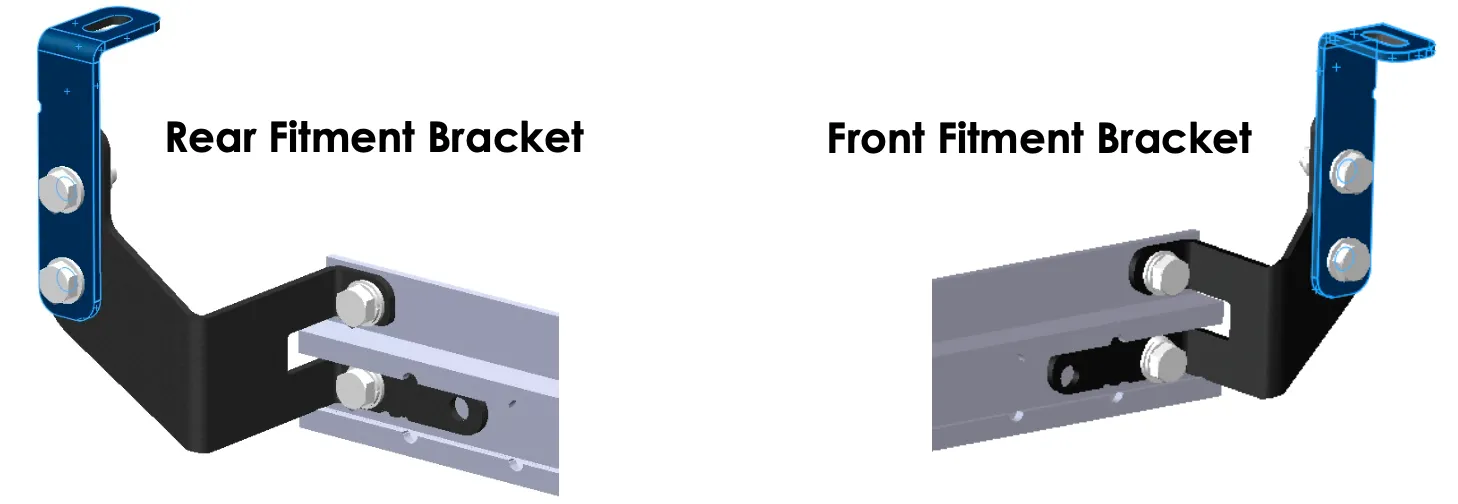
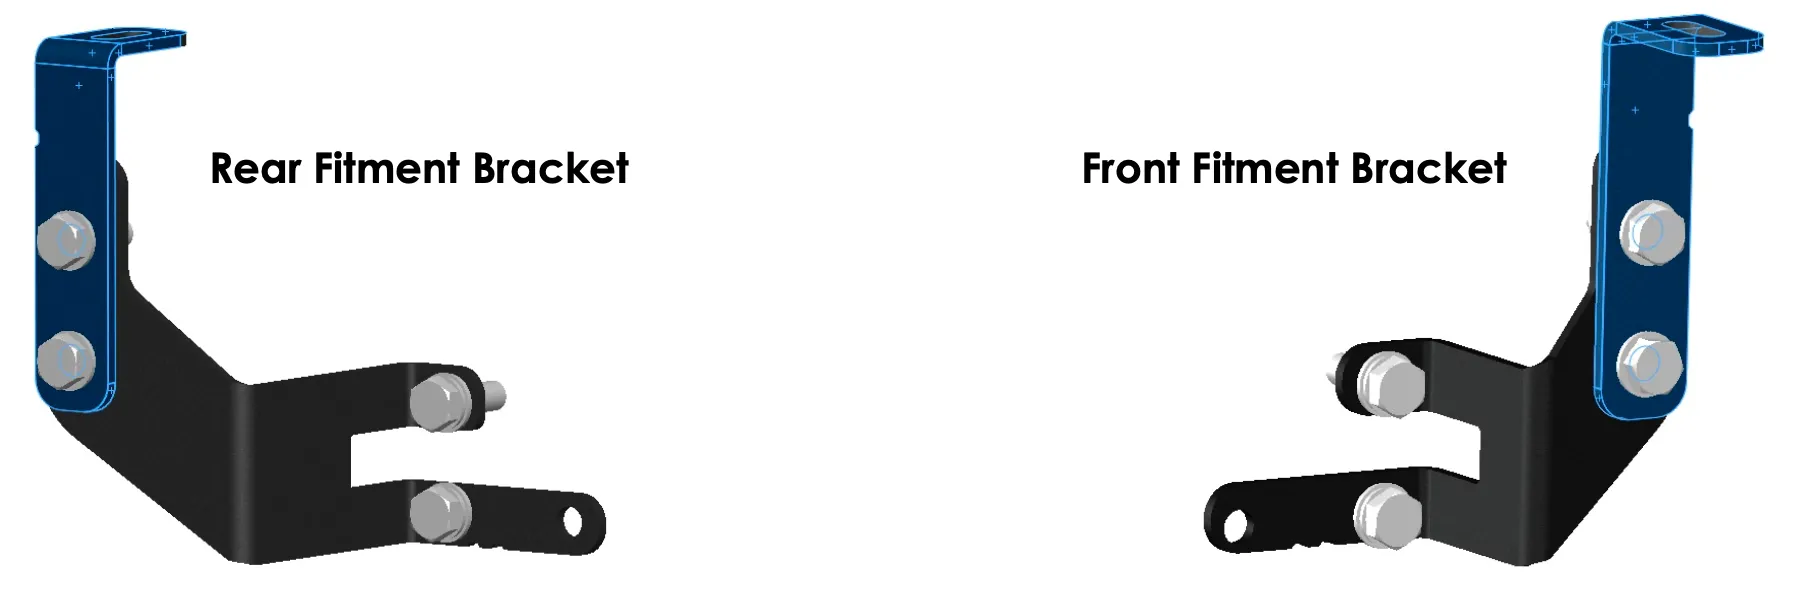
- Identify the front & rear fitment brackets:


Prepare the LE/PRO load box for fitment:
- Locate the front & rear mounting points to fit the fitment brackets.

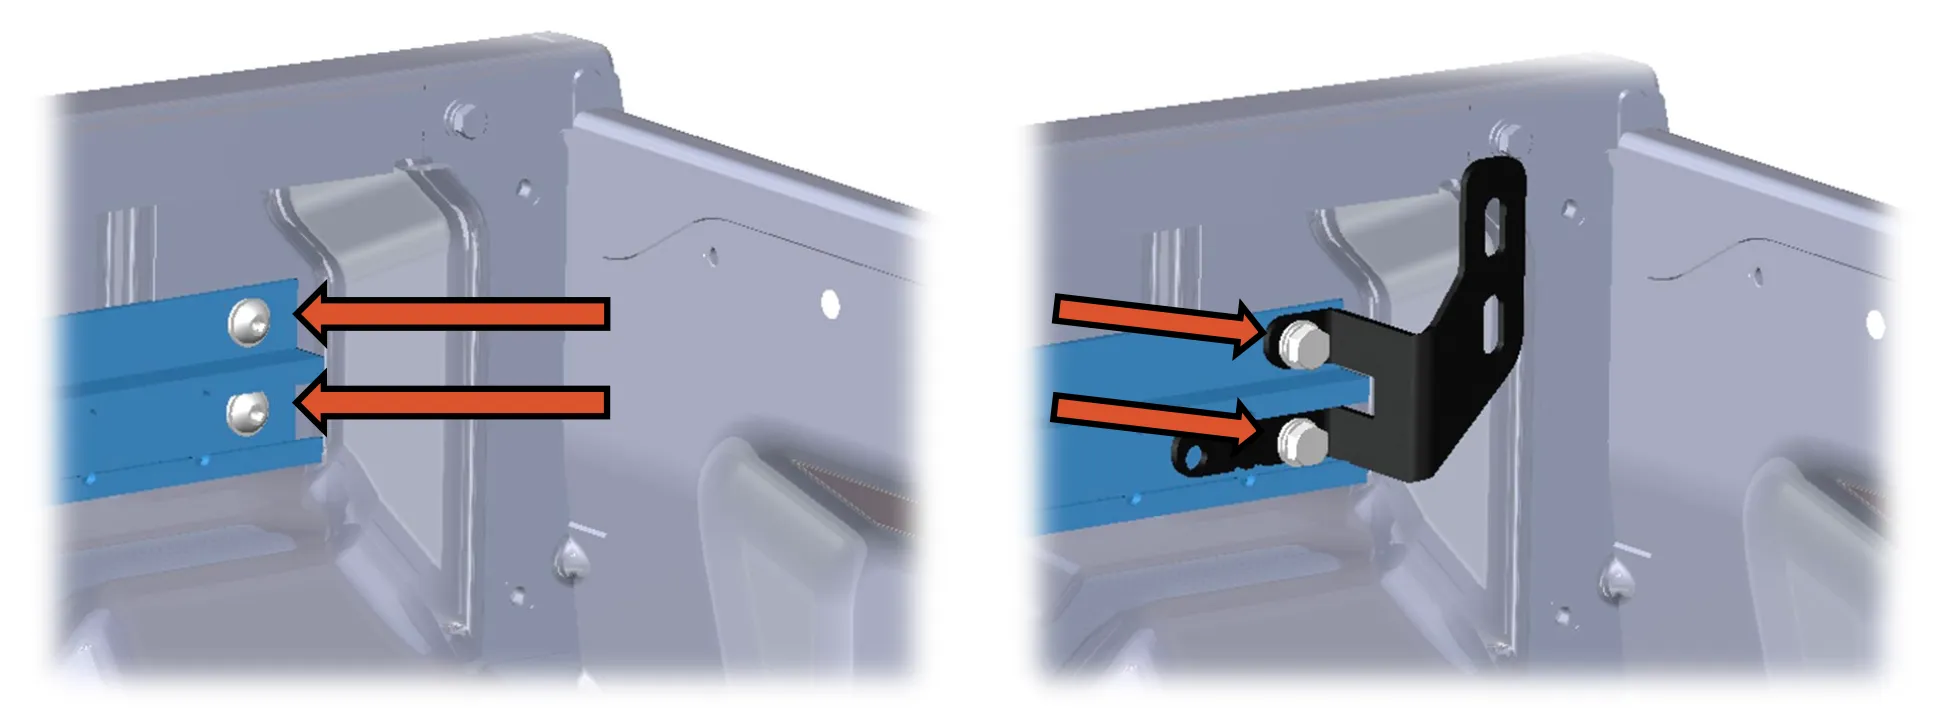
- REAR FITMENT BRACKET: Remove the 2 x M10 bolts at the back of the Utili-Track, then slide the bottom flange of the tail gate bracket as seen below into the rail, align the two holes and properly fasten with the supplied two M10 bolts, insert a M10 flat washer and M10 Spring Washer with each bolt.

- FRONT FITMENT BRACKET: Remove the 2 x M10 bolts at the front of the Utili-Track, then slide the bottom flange of the tail gate bracket as seen below into the rail, align the two holes and properly fasten with the supplied two M10 bolts, insert a M10 flat washer and M10 Spring Washer with each bolt.
- When both the front & rear of the Utili-Track are fitted with the fitment brackets, fasten the Cab-and-tail gate Inner bracket to the lowest point in the slot as seen below, using 2x M10 x 30 Bolts, 4 x M10 washers and 2 x M10 Lock nuts per bracket:
- Ensure that the rear cab window of the vehicle is clean, before loading the canopy onto the load bin.
Prepare the SE load box for fitment:
- Locate the front & rear mounting points to fit the fitment brackets.
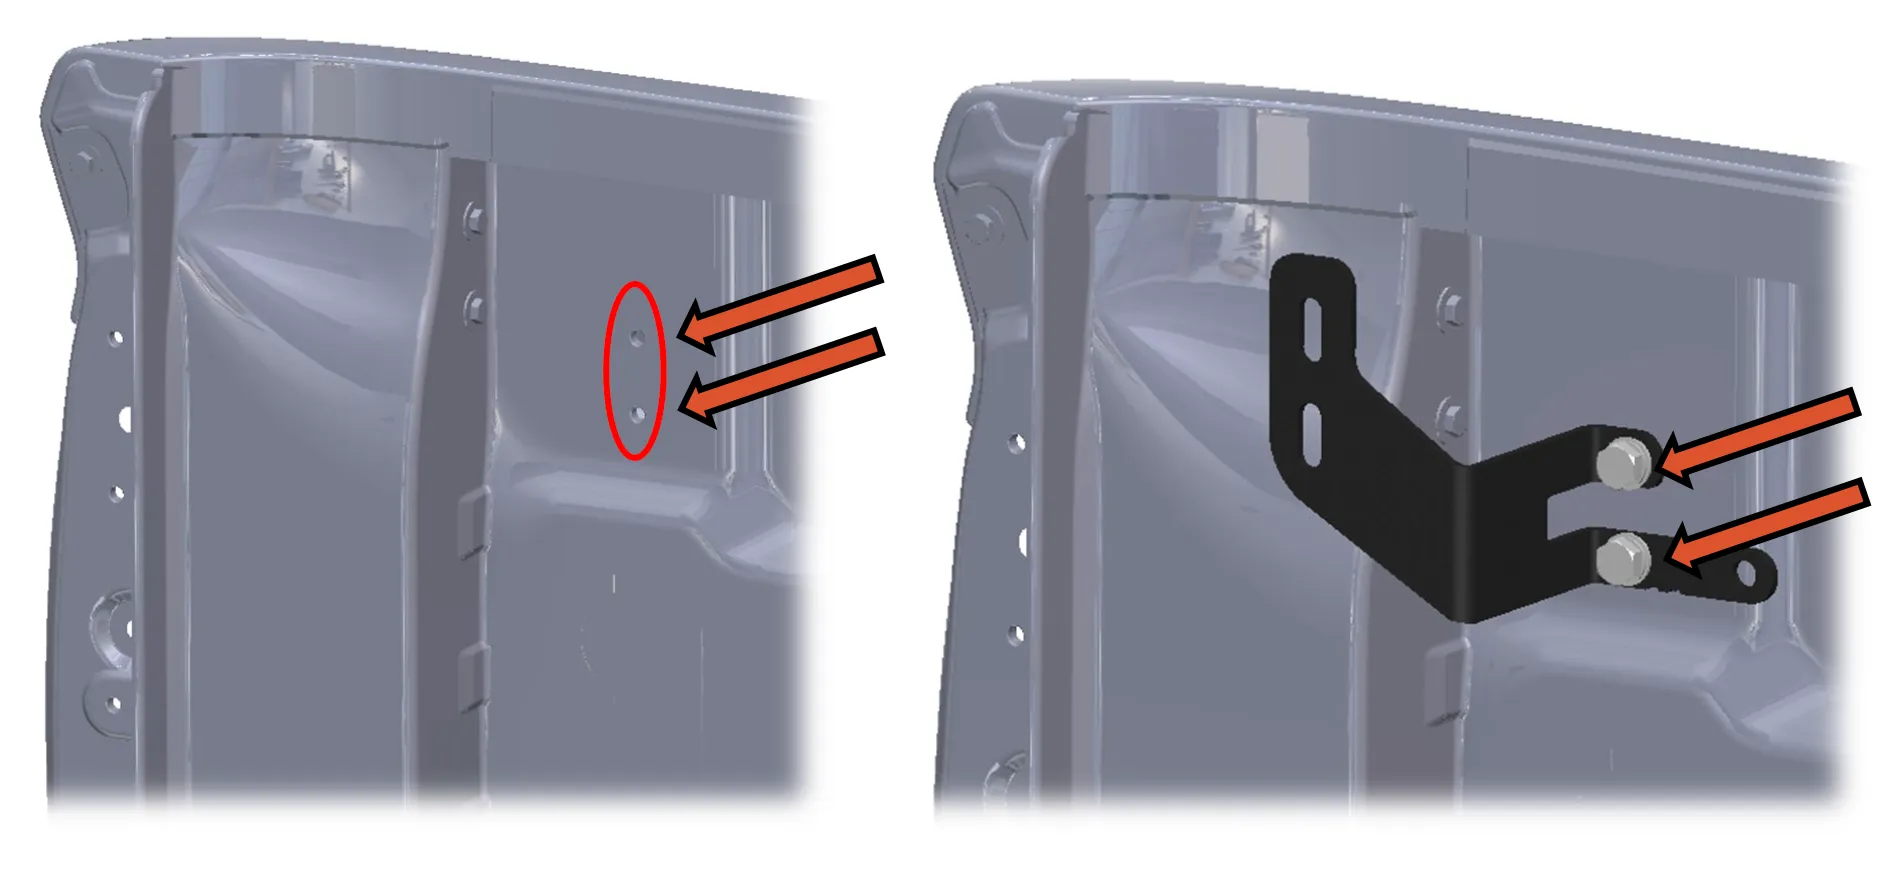
- REAR FITMENT BRACKET: Align the 2 x holes of the tailgate bracket as seen below, properly fasten with the supplied two M10 bolts, insert an M10 flat washer and an M10 spring washer with each bolt. Repeat the process on the front of the load box. (If you wish to keep the tie-down brackets, these can be bolted over the fitment bracket)
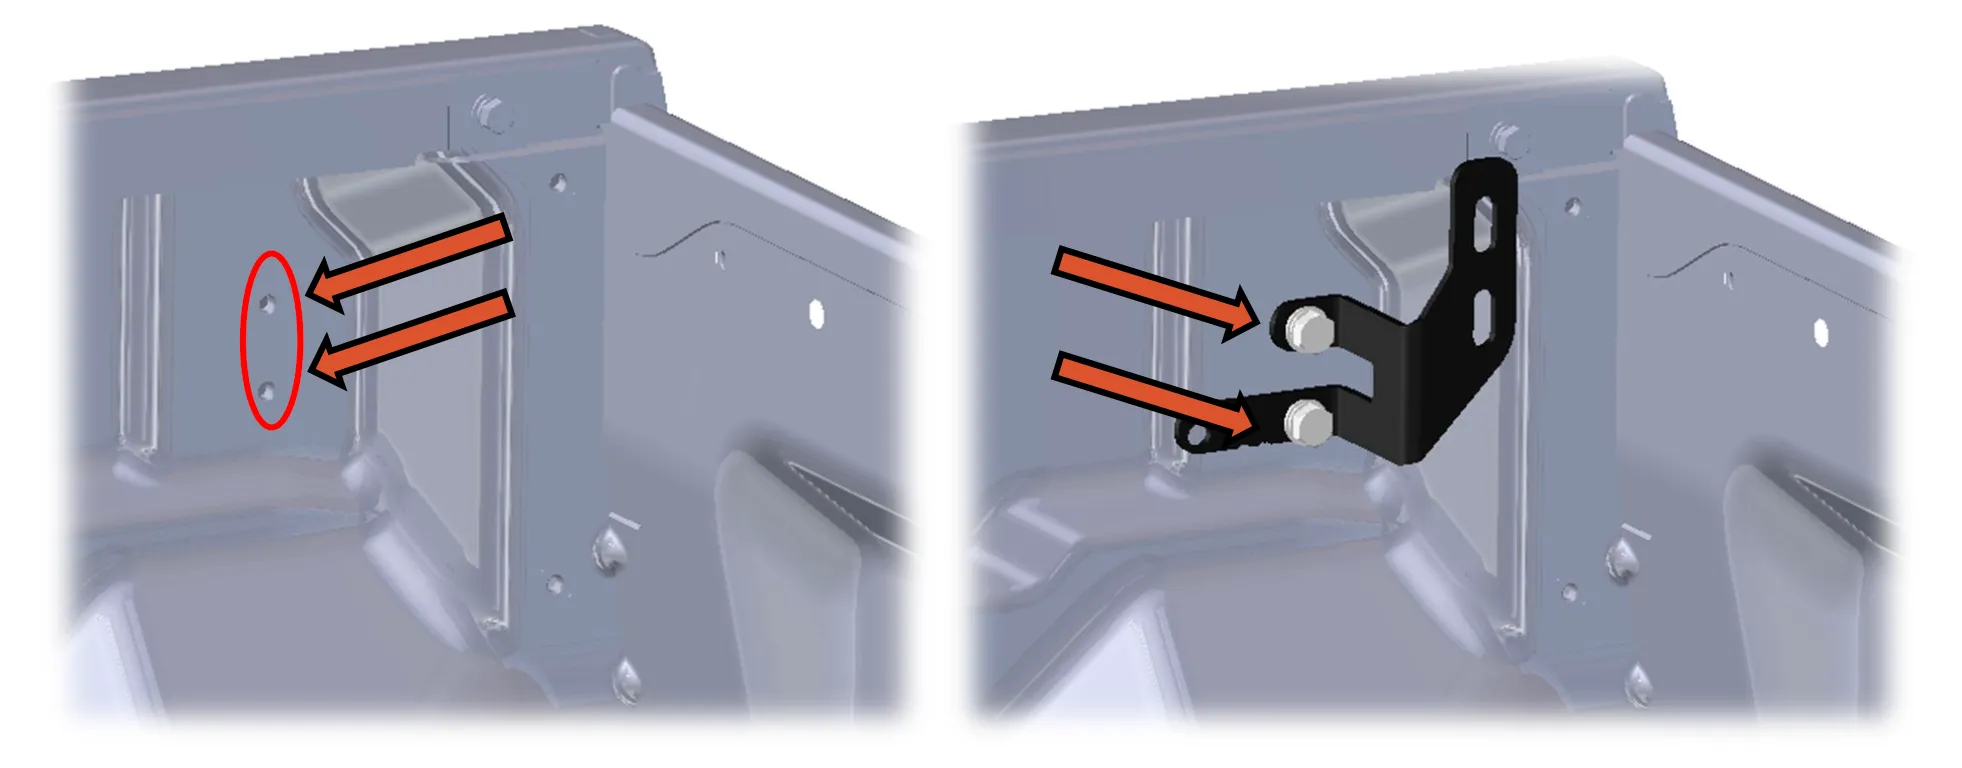
- FRONT FITMENT BRACKET: Align the 2 x holes of the tailgate bracket as seen below, properly fasten with the supplied two M10 bolts, and insert an M10 flat washer and an M10 spring washer with each bolt. Repeat the process on the front of the load box. (If you wish to keep the tie-down brackets, these can be bolted over the fitment bracket)
- When both the front & rear of the Utili-Track are fitted with the fitment brackets, fasten the Cab-and-tail gate Inner bracket to the lowest point in the slot as seen below, using 2x M10 x 30 Bolts, 4 x M10 washers and 2 x M10 Lock nuts per bracket:
- Ensure that the rear cab window of the vehicle is clean, before loading the canopy onto the load bin.
- Load the canopy on to the loading bin, align & space evenly.
- Once the canopy is in place, ensure that the slots in the canopy side trims align with the slots in the fitment brackets. Once alignment is confirmed in all 4 corners, use a M10 x 30 bolt and M10 body washer on top, then 1 x M10 flat washer and 1 x M10 nylock nut on the bottom to pull the canopy to the brackets, tighten all bolts to 25nm.
