Rhinoman Fitment Instructions for Nissan NP300 Double Cab
Fitment Instructions
for Nissan
NP300
Double Cab
RHINOLITE & COMMERCIAL
Fitment Kit Contents
Description
Quantity
Illustration
M8 x 20 Bolt
8
M8 x 25 Bolt
6
M8 x 40 Bolt
2
M8 Nylock Nut
14
M8 Flat Washer
20
M8 Body Washer
10
M8 Spring Washer
4
M10 x 25 Bolt
2
M10 Body Washer
2
M10 Spring Washer
2
Cab Side Bracket Inner
2
Cab Side Bracket Outer
2
Tail Gate Bracket LH
1
Tail Gate Bracket RH
1
Tail Gate Bracket Inner
2
Required Tools
Description
Illustration
13mm Spanner
13mm Socket Wrench (Optional)
17mm Spanner
17mm Socket Wrench (Optional)
Drill
9mm Drill bit
Installation Time & Care Instructions
- Approx. 45 Minutes (Excluding the removal of any accessories from load bin)
- Before installation, ensure that your hands and workwear are clean from oil, grime & dirt.
- Ensure that the correct tools and PPE are used whilst installing the canopy. Clean the rear cab window before fitting the canopy.
- Torque all M8 fasteners to approx. 28Nm.
- Torque all M10 fasteners to approx. 56Nm.
Fitment Steps
Step 1
- Unpack all components and hardware from packaging. Ensure that everything is accounted for as indicated above.
Step 2
- Remove any cab guards, roll bar, tonneau cover, sports bar etc. from vehicle.
Step 3
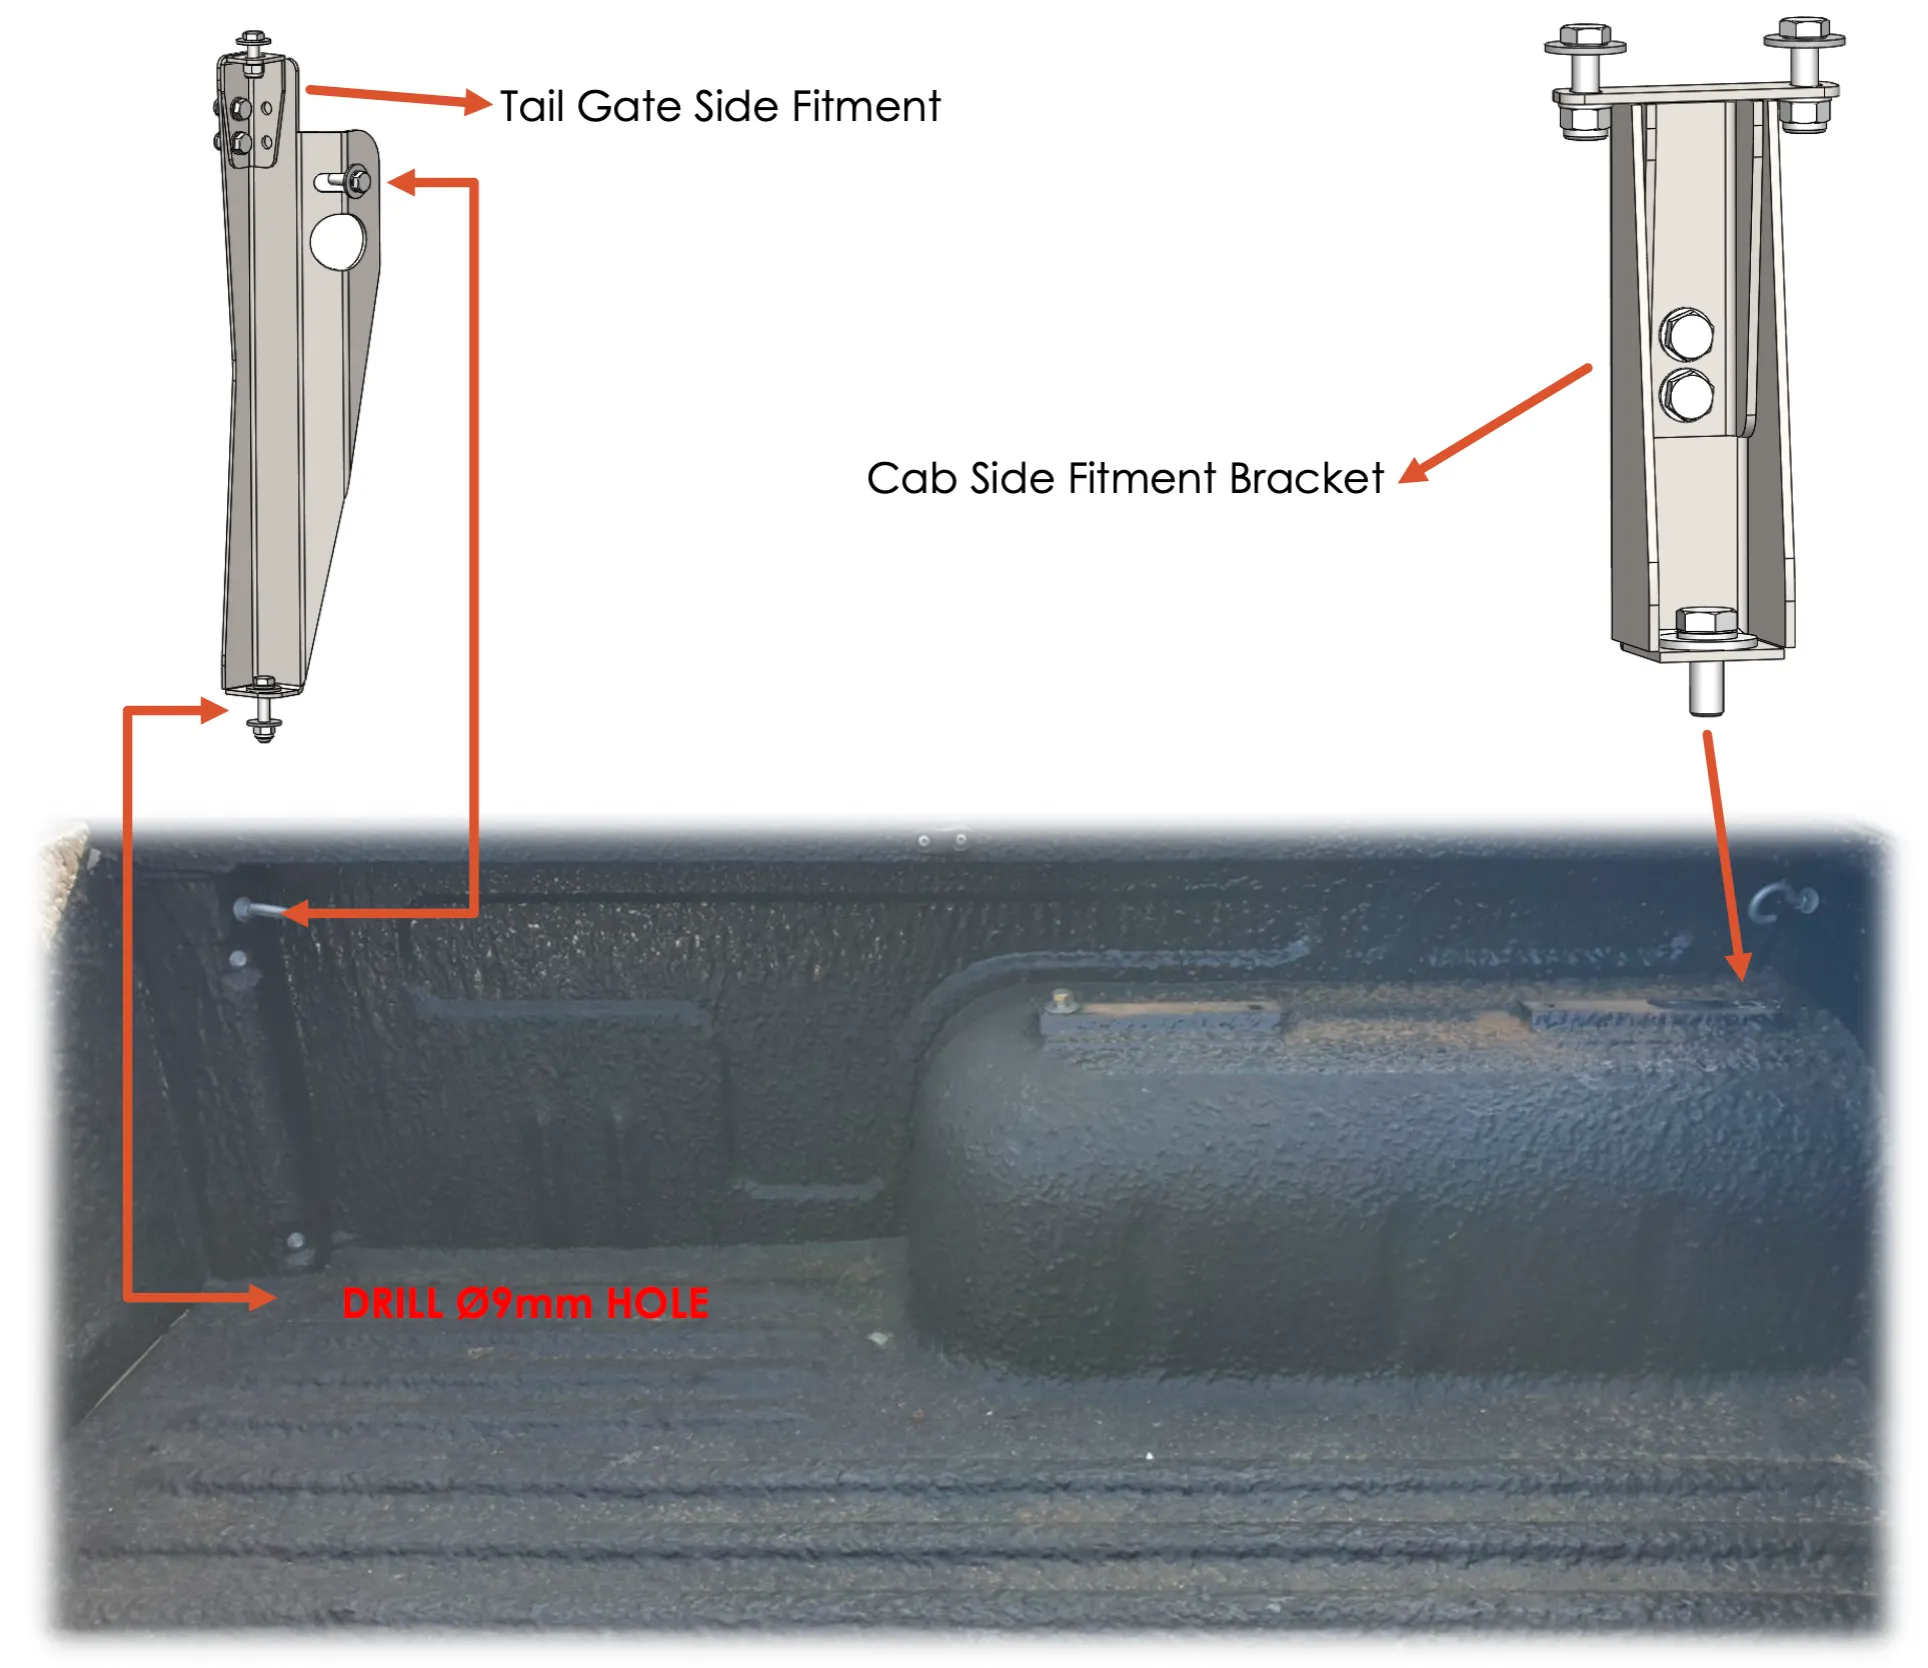
- Remove the factory-fitted tie-down hooks.
- Insert & align the cab side bracket with the front M8 hole located closest to the cab on the wheel arch.
- Insert & align the Tailgate side brackets with the rear tie-down fastening points.
- Drill a Ø9mm hole into the load box, center to the bottom hole on the tailgate bracket. Ensure that there are no obstructions below the load box before drilling.
- Secure brackets with provided bolts on the OEM tie-down points & newly drilled holes.
- Ensure that the rear cab window of the vehicle is clean, before loading the canopy onto the load bin.
Step 4
- Fit the canopy to the loading bin, align & space evenly.
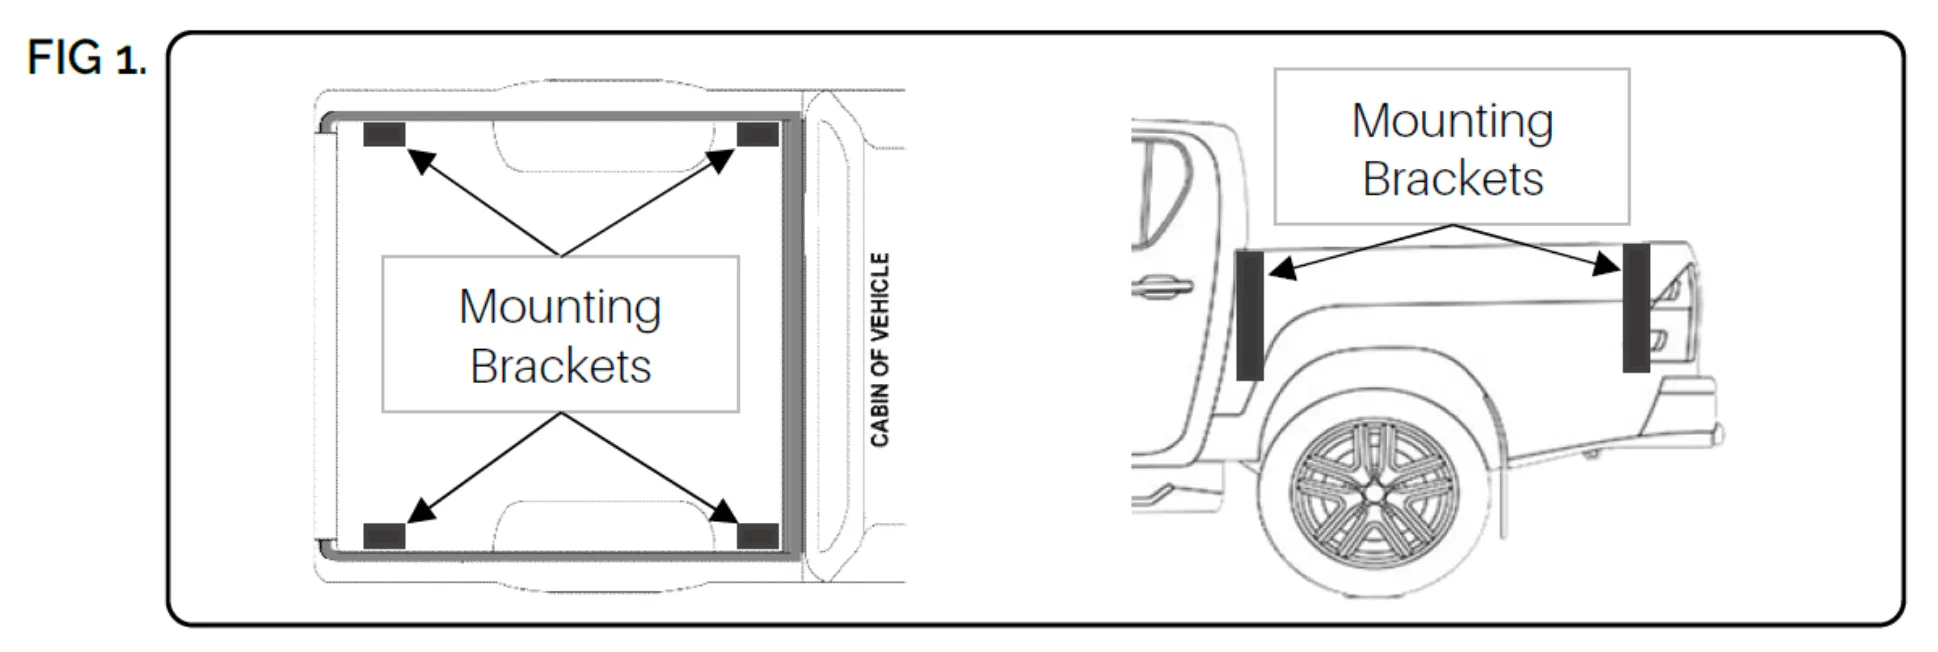
- Line-up the canopy fastening points with the brackets’ fastening points. (Fig. 1).
- When the canopy is resting on the load bin, adjust the brackets to achieve a gap of approx. 6mm between the canopy fastening surface and the bracket top surface. (Fig2.)
- Once the canopy is aligned and in place, use a black marker to mark the hole positions of the fitment brackets. Once all 4 x corners are marked, drill a Ø9mm hole into the side trim through the vehicle load box edge.
- Secure the brackets to the load body by fastening the bolts slowly & securely.
- Secure the canopy to the brackets using the bolts supplied, tighten the bolts to secure the two surfaces firmly, into the factory supplied threaded holes.
Step 5
- Trim sealing rubber on tailgate with knife or scissors.
- Check again for alignment of canopy on sides of loading bin.
- Check all bolts one final time.
- Enjoy your NEW Rhinoman all Aluminum Canopy.
WARRANTY, SERVICE & CARE GUIDE
- All Rhinoman products carry a comprehensive 2-year factory warranty.
- PLEASE NOTE: Your canopy will only be covered under warranty if it has been fitted by an approved Rhinoman fitment centre or agent.
- Please do inspect the fasteners on the fitment brackets every once in a while, to ensure that all bolts are still tight and properly secured.